Unisign Machine Tools » Clamping techniques

Clamping of workpieces
Use the correct clamping technique


Using the right CNC machine is one thing, but knowing how to use it properly is another. Ensuring that a workpiece is clamped firmly on the machine is vital, if you want to avoid vibrations during milling or turning operation. Otherwise, it will result in inaccurate and sub-optimal machining, leading to reduced product quality and causing tools to wear more quickly. Plus, it can create unsafe situations for machine operators. So, make sure you pay enough attention to clamping the workpiece correctly. And always use the right clamping tools and techniques when milling and turning.

Determine whether you need a universal or specific clamping technique
There are different ways to clamp a workpiece. So, which is the right one? This depends on the shape and material of the product you are going to machine. What is your workpiece made of? How big is it and what shape is it? What machining operations will you carry out on it and what forces will it be subject to?

Shape
The workpiece that you are machining will have specific dimensions, ranging from very large to very small. It might be a rectangular block or a cylinder. It might have uneven sides or curved contours. So, the right clamping technique to use, often depends on the product itself. Let’s compare a stable solid axle with a thin-walled tube, for example. They have the same outer shape, but they differ when it comes to the material thickness. This means you need a different clamping technique in each case.

Material
When machining a product made of metal, the cutting forces acting on it are often greater, so the clamping force needs to be strong enough too. If you are working with a plastic or aluminium product, magnetic clamping is obviously not an option. When it comes to thin, long aluminium sheets, opt for vacuum clamping instead.

Series volume
The volume of the series you are producing is also something to consider in choosing the right clamping technique. If your CNC machines are running around the clock to machine a universal product in a large series, automated clamping is the obvious choice. But if you are constantly machining single pieces and need to change parts in between, manual clamping is often the way to go. Cycle time is a factor too, of course, because this can be an expensive solution if it takes 5 minutes to machine your product and 10 minutes to reclamp. After all, you want your CNC machine to do what you bought it for: spend the maximum amount of time machining, with as little downtime as possible.
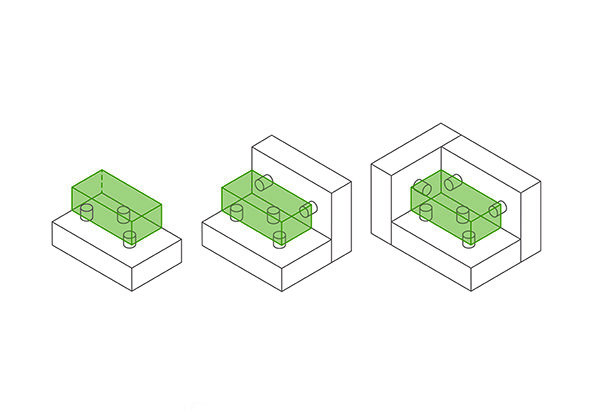
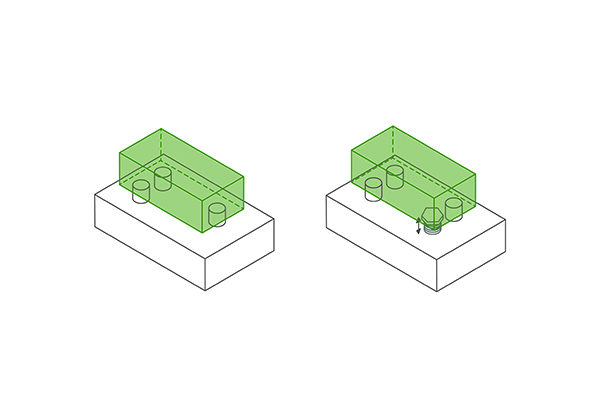
The best way to clamp your workpiece is according to the 3-2-1 principle.

3-2-1- principle for correct clamping

Use the 3-2-1 principle

The best way to clamp your workpiece is to use the 3-2-1 principle. This involves defining the 6 degrees of freedom for your workpiece during machining. By using 6 positioning points (3+2+1 = 6), you remove all degrees of freedom from the workpiece, keeping it firmly fixed in place. See the images below.

To apply the 3-2-1 principle, you position the workpiece in 3 axes as follows:

  • Lay the workpiece on the 3 bottom fixture points; this creates a stable surface for the workpiece. Think of it like a table with 3 legs, which is always more stable than a table with 4 legs.
  • The 2 fixture points on the side ensure that the workpiece can no longer rotate and can only move in 1 direction.
  • With the final 1 fixture point, you remove the last remaining degree of movement.

Now all you need to do is make sure you use the right clamping technique and systems to secure the workpiece. So, to sum up: first position the workpiece correctly according to the 3-2-1 principle, then clamp it firmly in place.

Avoid always underdetermined or overdetermined clamping

Underdetermined or overdetermined clamping

Avoid underdetermined or overdetermined clamping

If you deviate from the 3-2-1 principle when clamping your workpiece, then your clamping might end up being what we call underdetermined or overdetermined. If you use fewer than 3 fixture points, the product will not be stable on the surface, which makes it underdetermined. Imagine having a chair with 2 legs: it will always fall over because 2 fixtures are not enough.

Conversely, if you use more than 6 fixture points, the clamping will theoretically be overdetermined. Again, think of it like a chair: it needs at least 3 fixture points to stay upright. A fourth fixture is unnecessary in principle, but this does provide more stability. That is why it’s important to have flexibility in choosing any additional fixture points. This prevents the product from becoming deformed.

Clamping techniques
Which options are available?

To keep a workpiece in the right position during machining, clamp it against the fixture points according to the 3-2-1 principle. There are various clamping techniques you can use to do this, but the right technique depends heavily on your product (dimensions, shape and material type). The number of products and the variation in which you are producing them (series or single pieces) are also factors to consider. The most common clamping techniques are:

  • 1. mechanical clamping
  • 2. hydraulic clamping
  • 3. pneumatic clamping
  • 4. magnetic clamping
  • 5. vacuum clamping

Clamping technique: mechanical clamping

Mechanical clamping

Mechanical clamping

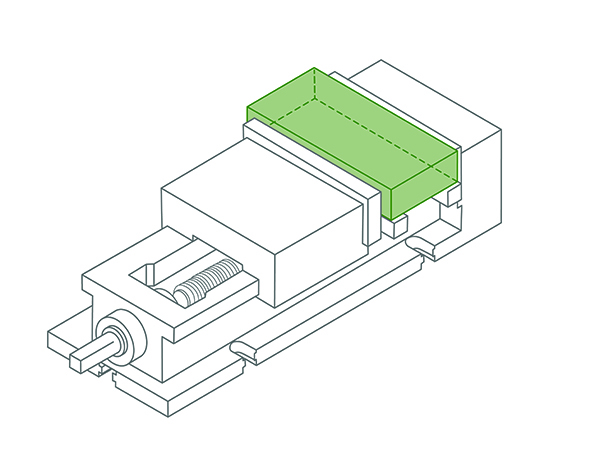
Mechanical clamping is a manual method, often employing a universal clamping device such as a machine clamp or a three-jaw chuck. If you are clamping larger workpieces, there are clamping bolts, claws or jaws available. This clamping technique is relatively cheap and suitable for machining single pieces.

As it can be used for a wide variety of products, mechanical clamping gives you the flexibility you need. However, the clamping time is relatively long because everything is done manually. Moreover, the human influence on the quality of the clamping varies the greatest with this technique. Without clear instructions, the clamping force could vary between operators, which reduces process reliability.

Clamping technique: hydraulic clamping

Hydraulic clamping

Hydraulic clamping

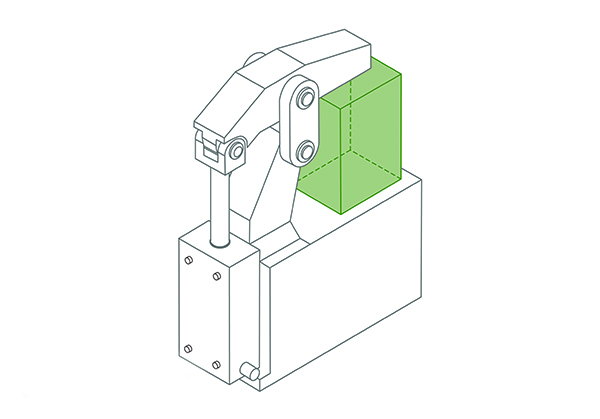
Hydraulic clamping is a commonly used technique for products machined in series. You can achieve high clamping forces with this technique. A downside is that hydraulic clamping is often more complex and more expensive. The major advantage of hydraulics is the high process reliability they provide, as you can control the fixture automatically. With an automatic loading cycle, you reduce clamping time and increase production.

Clamping technique: pneumatic clamping

Pneumatic clamping

Pneumatic clamping

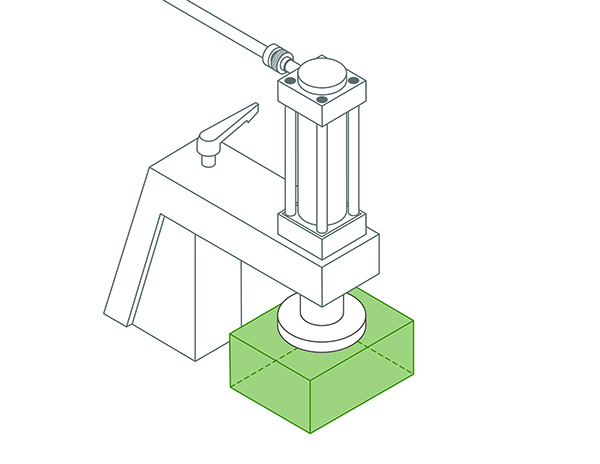
Pneumatic clamping is similar to hydraulic clamping, in that the workpiece is also clamped using force. However, pneumatics are not as strong as hydraulics. Pneumatic clamping is therefore generally used for lighter machining work, such as when machining materials like wood or plastic.

Clamping technique: magnetic clamping

Magnetic clamping

Magnetic clamping

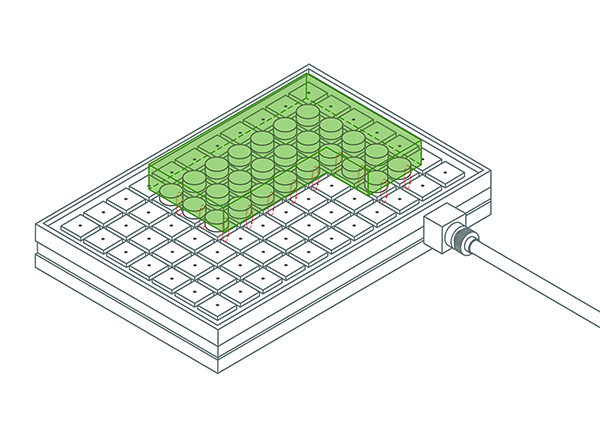
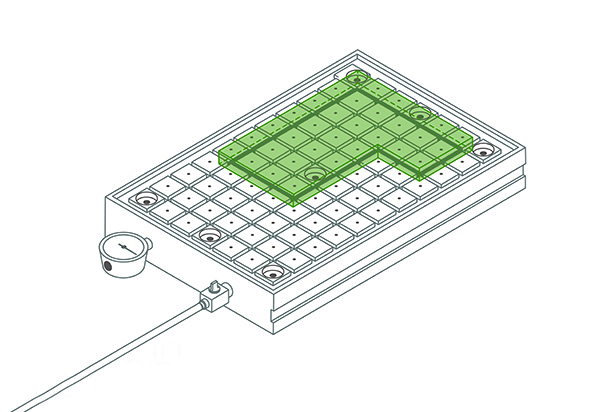
Magnetic clamping is a good solution for flat sheets, strips or workpieces that cannot be clamped sufficiently with mechanical clamps. By controlling magnetic clamping plates electrically or manually, you can raise and lower a workpiece using magnetic force. The disadvantage is that the clamping force is limited and you always need a large surface area to be able to clamp sufficiently. On the other hand, magnetic clamping is a universal solution that works whatever the shape of the product.

If your product has a different, step-like shape, it is best to work with pole extenders, which are steel blocks that you use to fill in the gaps in the product and extend the magnetic field.

Clamping technique: vacuum clamping

Vacuum clamping

Vacuum clamping

Vacuum clamping is ideal for thin-walled workpieces without carbon steel, such as aluminium sheet parts or plastic parts. Because the thin-walled part is vacuum-clamped, this will reduce vibration during machining. When vacuum clamping, make sure that there is enough surface area to create the clamping force.